How To Complete GeM Vendor Registration: Step-By-Step
Complete gem vendor registration with this step-by-step guide. Learn to verify documents, link Aadhaar, and list products to win more government contracts.
If you want to sell products or services to government departments in India, GeM vendor registration is the mandatory first step. The Government e-Marketplace (GeM) is where central and state agencies procure everything from office supplies to large-scale infrastructure services, and without an active seller account, you're locked out of that entire pipeline.
The registration process itself is straightforward, but small mistakes, wrong document uploads, mismatched business details, or skipped verification steps, can delay your approval or get your application rejected outright. This guide walks you through the exact steps to register as a vendor on GeM, the documents you'll need ready, and the eligibility criteria you should confirm before you start.
At Arched, we help contractors and infrastructure firms find and win government contracts across 500+ procurement portals, including GeM. Registration gets you in the door, what comes after is where strategy matters. Let's start with getting your account set up the right way.
What to know before you register
Before you touch the GeM portal, spend ten minutes confirming you actually meet the eligibility requirements and have the right documents on hand. Jumping into the form without this preparation is the most common reason applications stall or get rejected halfway through the process.
Who can register as a seller on GeM
GeM is open to a wide range of business types, including sole proprietors, partnership firms, private limited companies, public limited companies, and startups recognized under DPIIT. You do not need to be a large firm to qualify. Individual service providers and MSMEs can register, and GeM actively encourages small and medium enterprises through its Udyam integration.
If your business is not yet GST-registered, you can still sell certain goods below the GST threshold, but most infrastructure and services contracts will require an active GSTIN.
Documents you need ready before you start
Having your documents prepared before you begin gem vendor registration saves significant time, since the portal will prompt you for them at different stages. Uploading incorrect or mismatched files is the top cause of verification failures.

Here is what you need to gather:
| Document | Details |
|---|---|
| PAN Card | Must match the business entity or proprietor |
| Aadhaar Card | Required for identity verification of the signatory |
| GSTIN | Active GST registration number for your business |
| Udyam Registration | Required if you want to register as an MSME |
| Bank Account Details | Account number, IFSC code, and cancelled cheque |
| Business Address Proof | Utility bill, rent agreement, or property document |
| Company Incorporation Documents | MOA, AOA, or partnership deed depending on entity type |
Check that the name on your PAN matches the name on your Aadhaar exactly. Even a minor difference in spelling will cause the verification step to fail and force you to restart. Pull all of these files into one folder before you open the GeM seller portal.
Step 1. Create your GeM seller account
Go to gem.gov.in and click "Seller" on the homepage. This is the starting point for your gem vendor registration, and it only takes a few minutes to get your initial account created. The portal will ask you to choose between registering as an individual or as a business entity, so know which category applies to your firm before you click through.
Set up your login credentials
On the registration page, you will enter your mobile number and create a password. GeM sends an OTP to your registered mobile to verify the number before it lets you proceed. Use a mobile number that belongs to the business signatory, not a general office line, because this number becomes the primary contact tied to your account and you will need access to it for future logins and notifications.
Make sure the mobile number you register is the same one linked to the Aadhaar of your authorized signatory, as mismatches here will block you at the next verification step.
After your phone is confirmed, the system generates a GeM Seller ID, which is your unique account identifier on the platform. Write this down. You will use it to log back in, track your application status, and reference your account in any correspondence with GeM support.
Step 2. Verify PAN, Aadhaar, and contact details
Once your GeM Seller ID is created, the portal moves you directly into identity verification. This step confirms that your business entity and its authorized signatory are legitimate, and it is the part where most applicants run into avoidable errors if their documents do not match exactly.
Link your PAN to the business entity
The portal prompts you to enter your PAN number, and the system automatically pulls the associated name from the Income Tax database. Check that the name displayed matches what you entered during account creation exactly, including spelling and spacing. If there is any discrepancy, GeM flags the application and halts the process.
Do not try to proceed with a partial name match hoping the system will accept it. Fix the mismatch at the source before you continue.
Complete Aadhaar OTP verification
After PAN is confirmed, the portal asks for your Aadhaar number linked to the authorized signatory. Entering the number triggers an OTP sent to the mobile number registered with UIDAI. You have a short window to enter this OTP, so have the signatory's phone available before you submit the Aadhaar number.
Once Aadhaar verification clears, you confirm your business email address and the mobile number on file. Both will receive a confirmation link or OTP. Completing this stage locks in your verified identity and allows your gem vendor registration to advance to the next phase of business and bank detail submission.
Step 3. Add business, GST, and bank details
With identity verification complete, the portal moves you to the business details section. This is where your GSTIN, company information, and bank account get entered and cross-verified against government databases. Any mismatch between your GST details and your registered business name will trigger a verification failure, so have your documents open as you fill in each field.
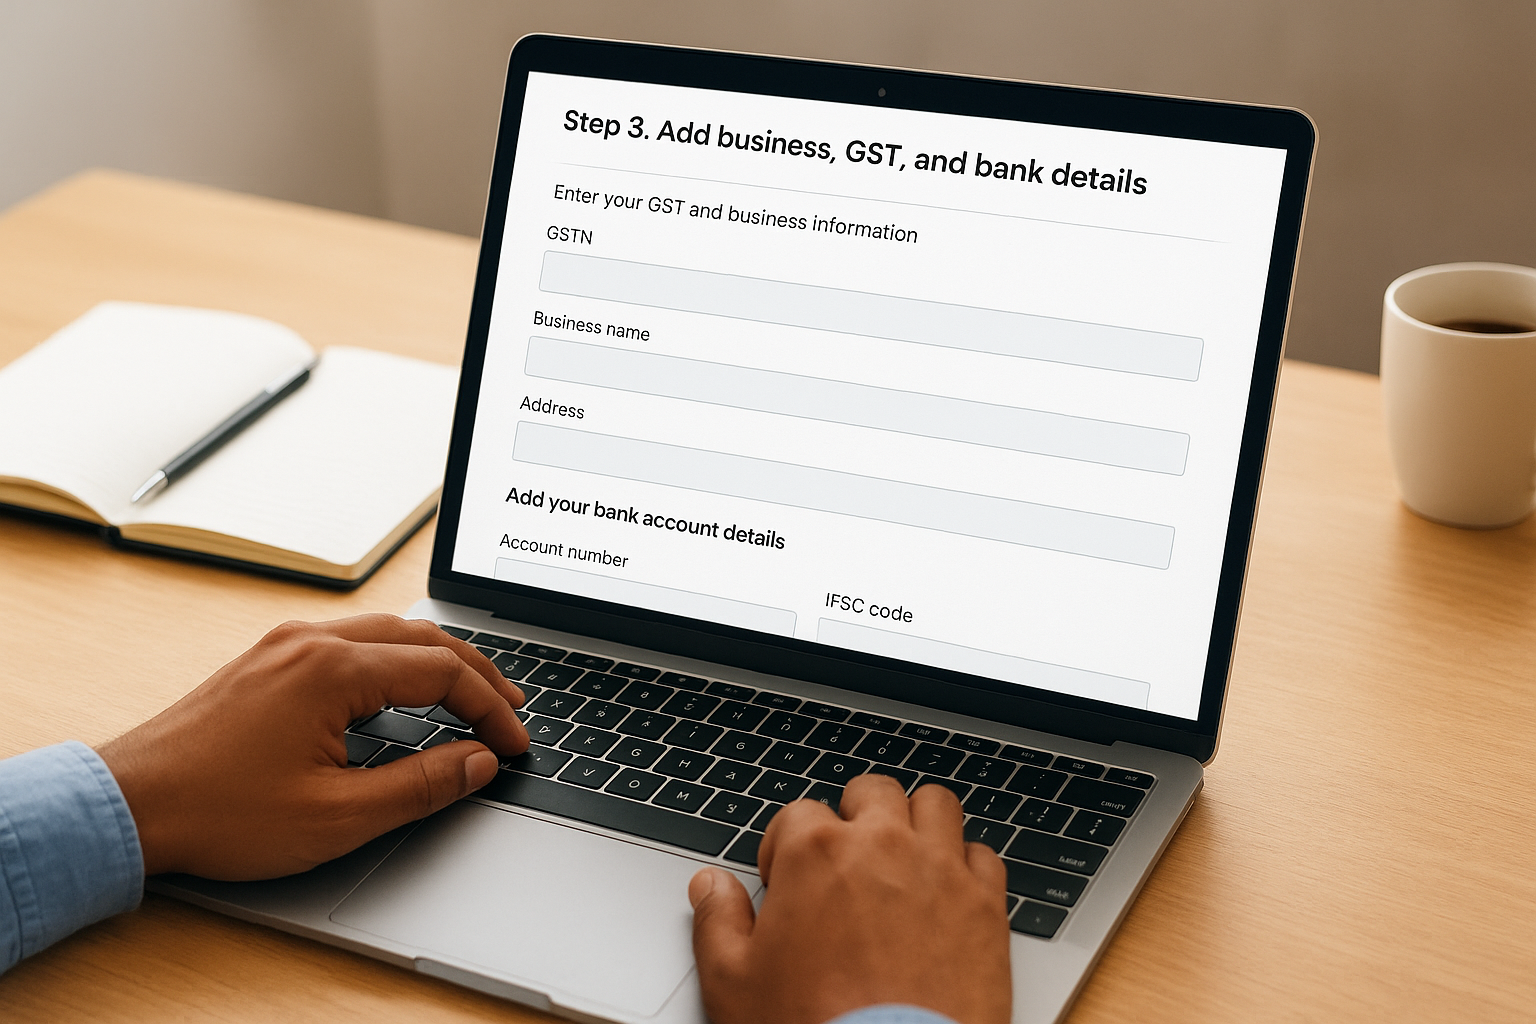
Enter your GST and business information
The portal asks for your GSTIN, and once you submit it, the system pulls your legal business name and address directly from the GST Network (GSTN). Confirm that the displayed details match your PAN and Aadhaar records exactly. If you are registered under Udyam, enter your Udyam Registration Number in the designated field to activate MSME benefits on your gem vendor registration profile.
Do not manually edit the auto-filled business name pulled from GSTN. If it looks wrong, update your GST records at the source first, then return to complete this step.
Add your bank account details
Enter your account number and IFSC code in the bank details section. The portal performs a penny drop verification, where a small amount (Re. 1) is deposited into your account to confirm it is active and matches the registered business name. This process typically completes within 24 hours.
Make sure the bank account is in the business entity's name, not a personal account, even for sole proprietors. A mismatch between the account holder name and your GeM business profile will fail the verification and delay your approval.
Step 4. Build your profile and list your catalogue
Once your bank verification clears, your gem vendor registration is technically active, but an incomplete profile limits how often your listings appear in government buyer searches. Spend time filling in every field on your seller profile before you start adding products or services.
Complete your seller profile
Your profile acts as your business credentials page for government buyers. Upload a clear company logo, write a concise business description that mentions your core capabilities, and add your certifications. Buyers filter vendors by category and quality marks, so accurate category mapping directly increases your visibility in relevant searches.
Selecting the wrong product or service category is one of the most common mistakes on GeM, and it routes your listings away from the buyers who actually need them.
Add products or services to your catalogue
Navigate to the "My Catalogue" section and select "Add New Product" or "Add Service" depending on what your firm offers. For each listing, you will need to fill in:
- Product or service name and description
- HSN or SAC code
- Unit price and applicable taxes
- Delivery timeline and geographic coverage
- Supporting compliance certificates
Set competitive prices from the start, since GeM displays multiple vendors side by side and buyers compare directly before placing orders. Review your listings once they go live to confirm all product details, pricing, and category tags are accurate before government buyers start landing on your profile.
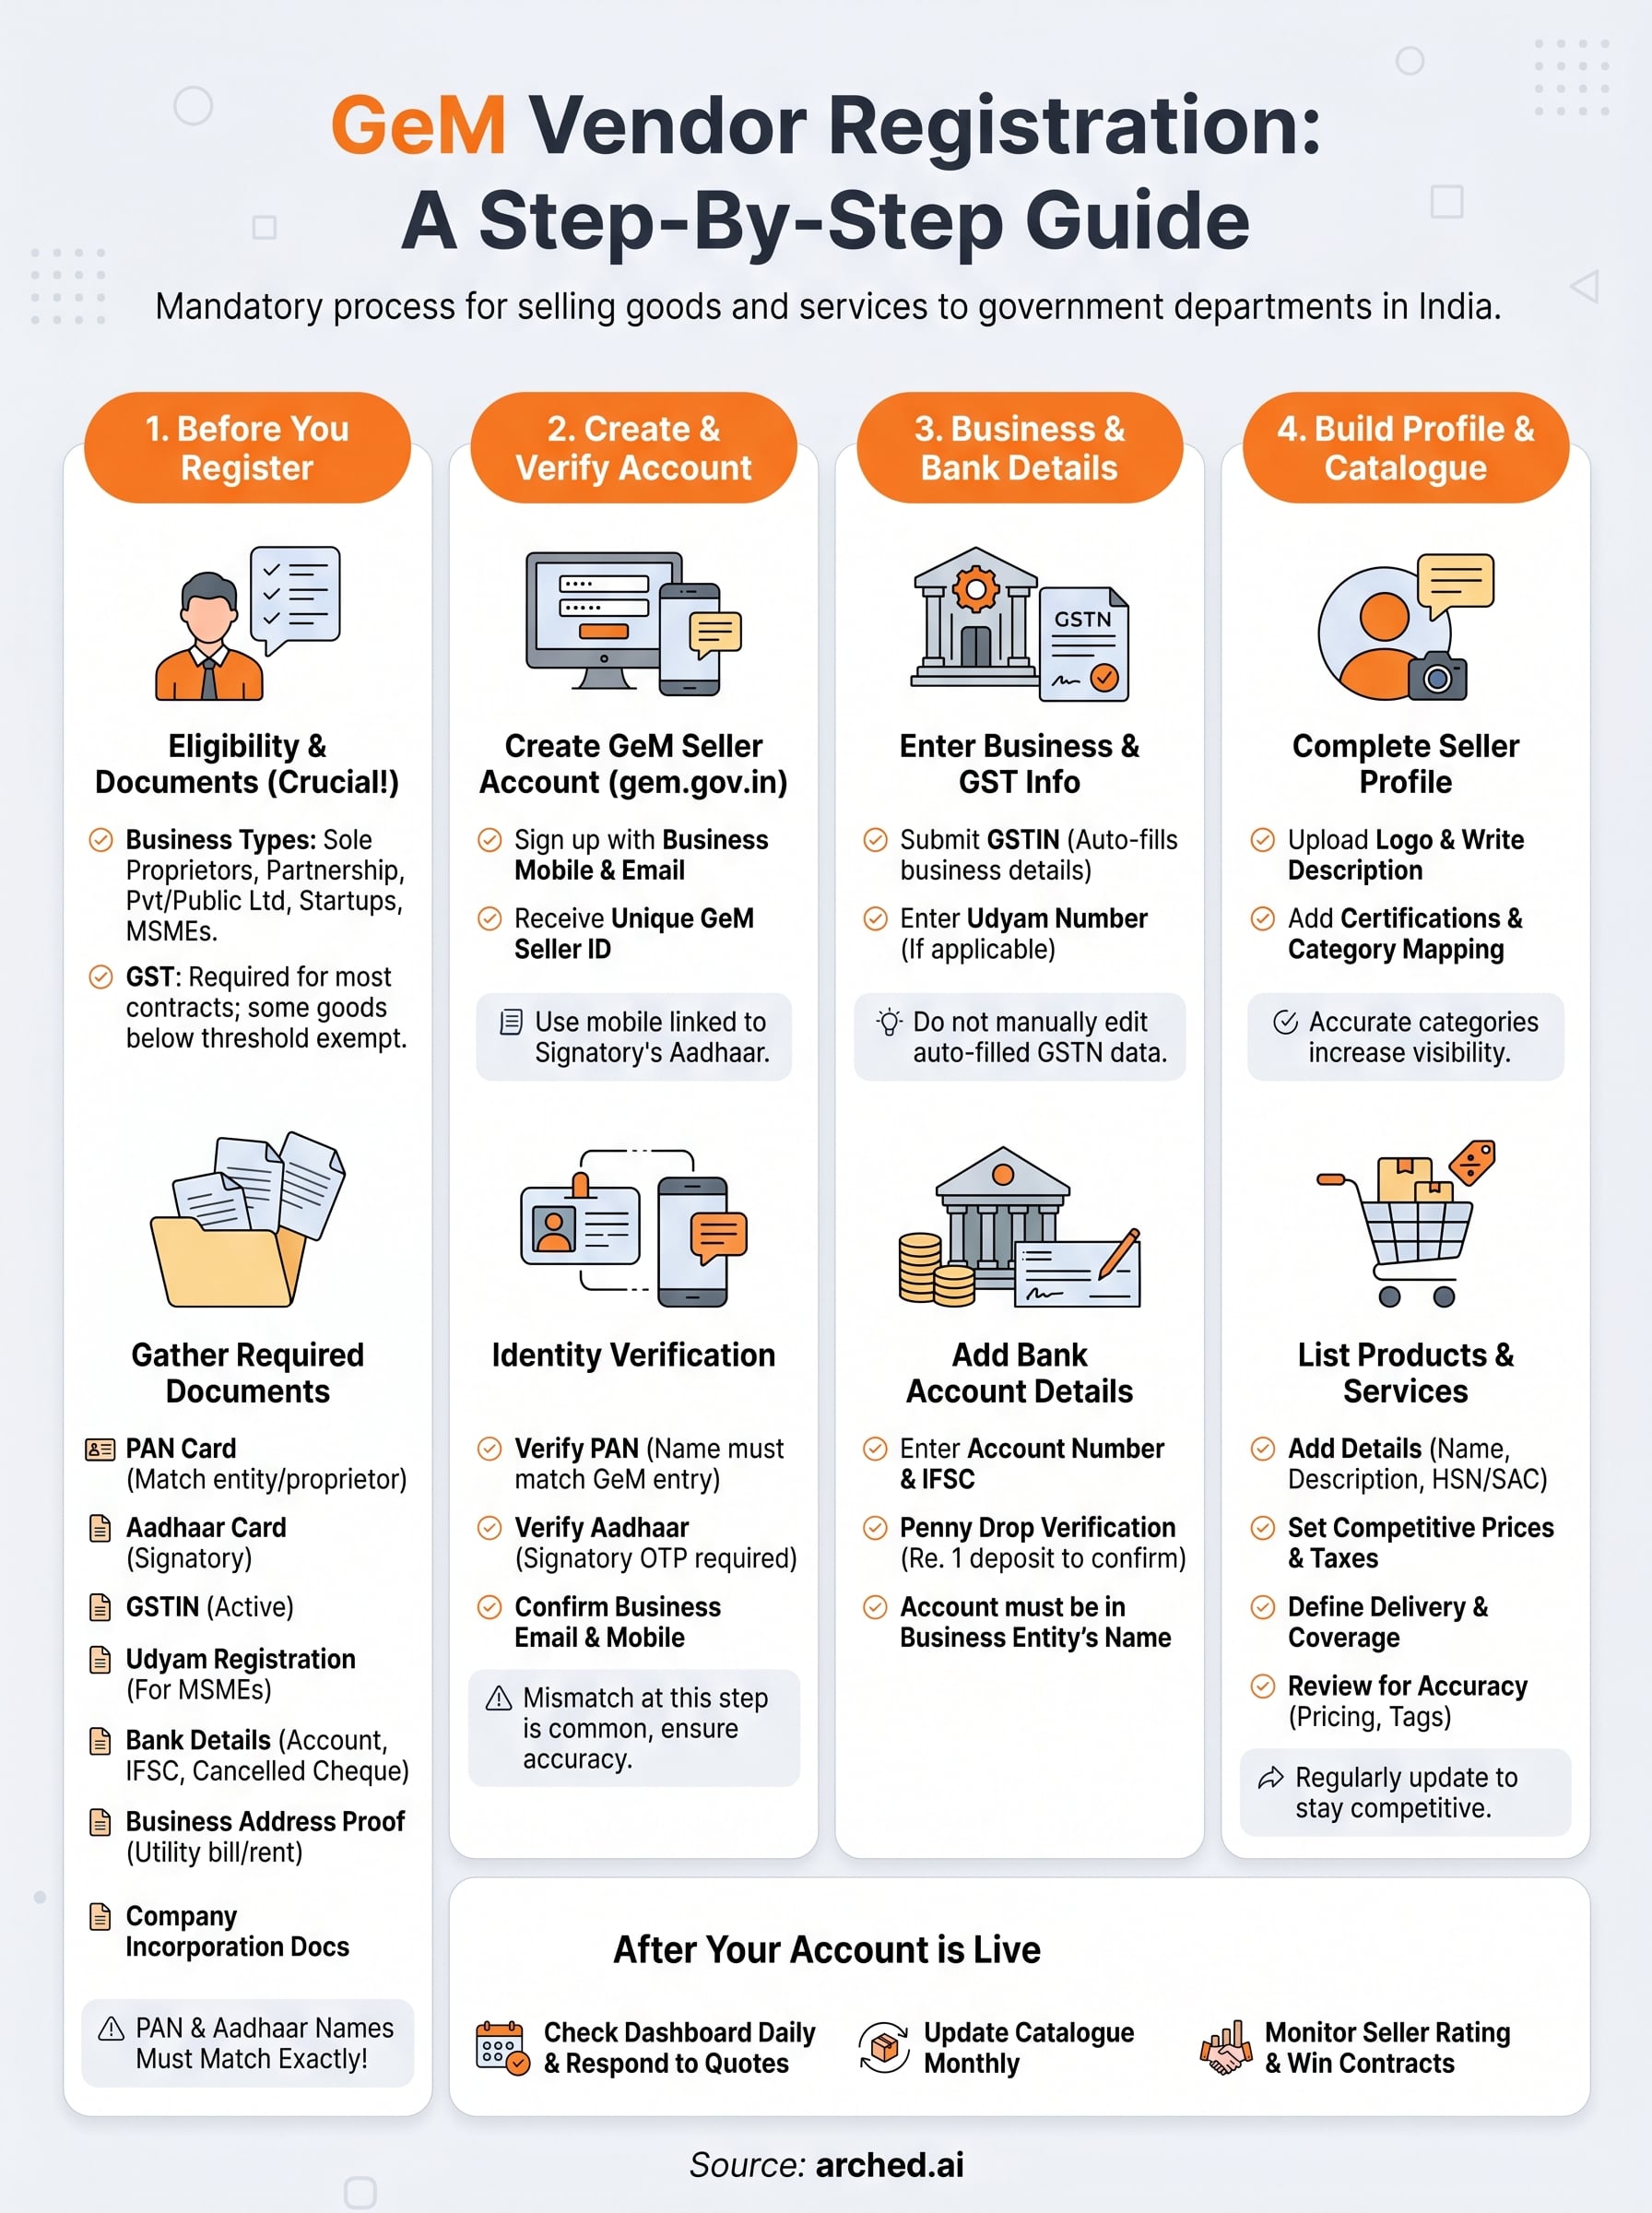
What to do after your account is live
Your gem vendor registration is complete, but winning contracts on GeM requires active effort beyond the initial setup. Check your seller dashboard daily for new tender matches and buyer inquiries, and respond to quotes within the platform's stated timelines. Late responses or missed bids damage your seller rating, which buyers see before they shortlist vendors.
Update your catalogue regularly. Stale pricing and outdated product details push your listings down in buyer searches, so review your entries every month and adjust rates to stay competitive. Add new certifications as you earn them, since stronger credentials unlock access to higher-value contracts.
GeM is one portal. More than 500 procurement platforms across India post infrastructure and services contracts that never appear on GeM, and manually monitoring all of them is not realistic. Arched tracks every relevant portal and matches opportunities to your firm's actual credentials and past project history. See how Arched finds your next government contract before your competitors do.